We are closed on 17 & 18 February for CNY celebration. 👉 Last order cutoff to ship before holiday: 15 February, 10PM (NY Time) Kindly place your order early to avoid delay. Business will resume after the holiday. Thank you & Gong Xi Fa Cai!
Closed for Lunar New Year (17–18 February 2026)
To avoid any delays, kindly place your orders before the final shipping cutoff on Sunday, 22:00 (UTC -5, New York Time) to ensure dispatch before the holiday. Business operations will resume after the holiday. Thank you for your understanding and continued support.
We are closed on 17 & 18 February for CNY celebration. Last order cutoff to ship before holiday: 15 February, 10PM (NY Time) Kindly place your order early to avoid delay. Business will resume after the holiday. Thank you & Gong Xi Fa Cai!
Sale!
Fusion Print UV DTF Sticker – 580 x 200 mm
$ 6.73–$ 7.40Price range: $ 6.73 through $ 7.40$ 4.71–$ 5.18Price range: $ 4.71 through $ 5.18
Artwork Specifications:
Size: 580 x 200 mm OR 22.8″ x 8″
File Format: PNG
Resolution: 300 DPI ONLY
Background: TRANSPARENT
Smallest Text/Design: More than 10 pixels / 0.85 mm /0.03 inch
Disclaimer: Customers hold full copyright responsibility for all designs printed with us. Kindly ensure you have proper permission to use any copyrighted materials before submitting your artwork.
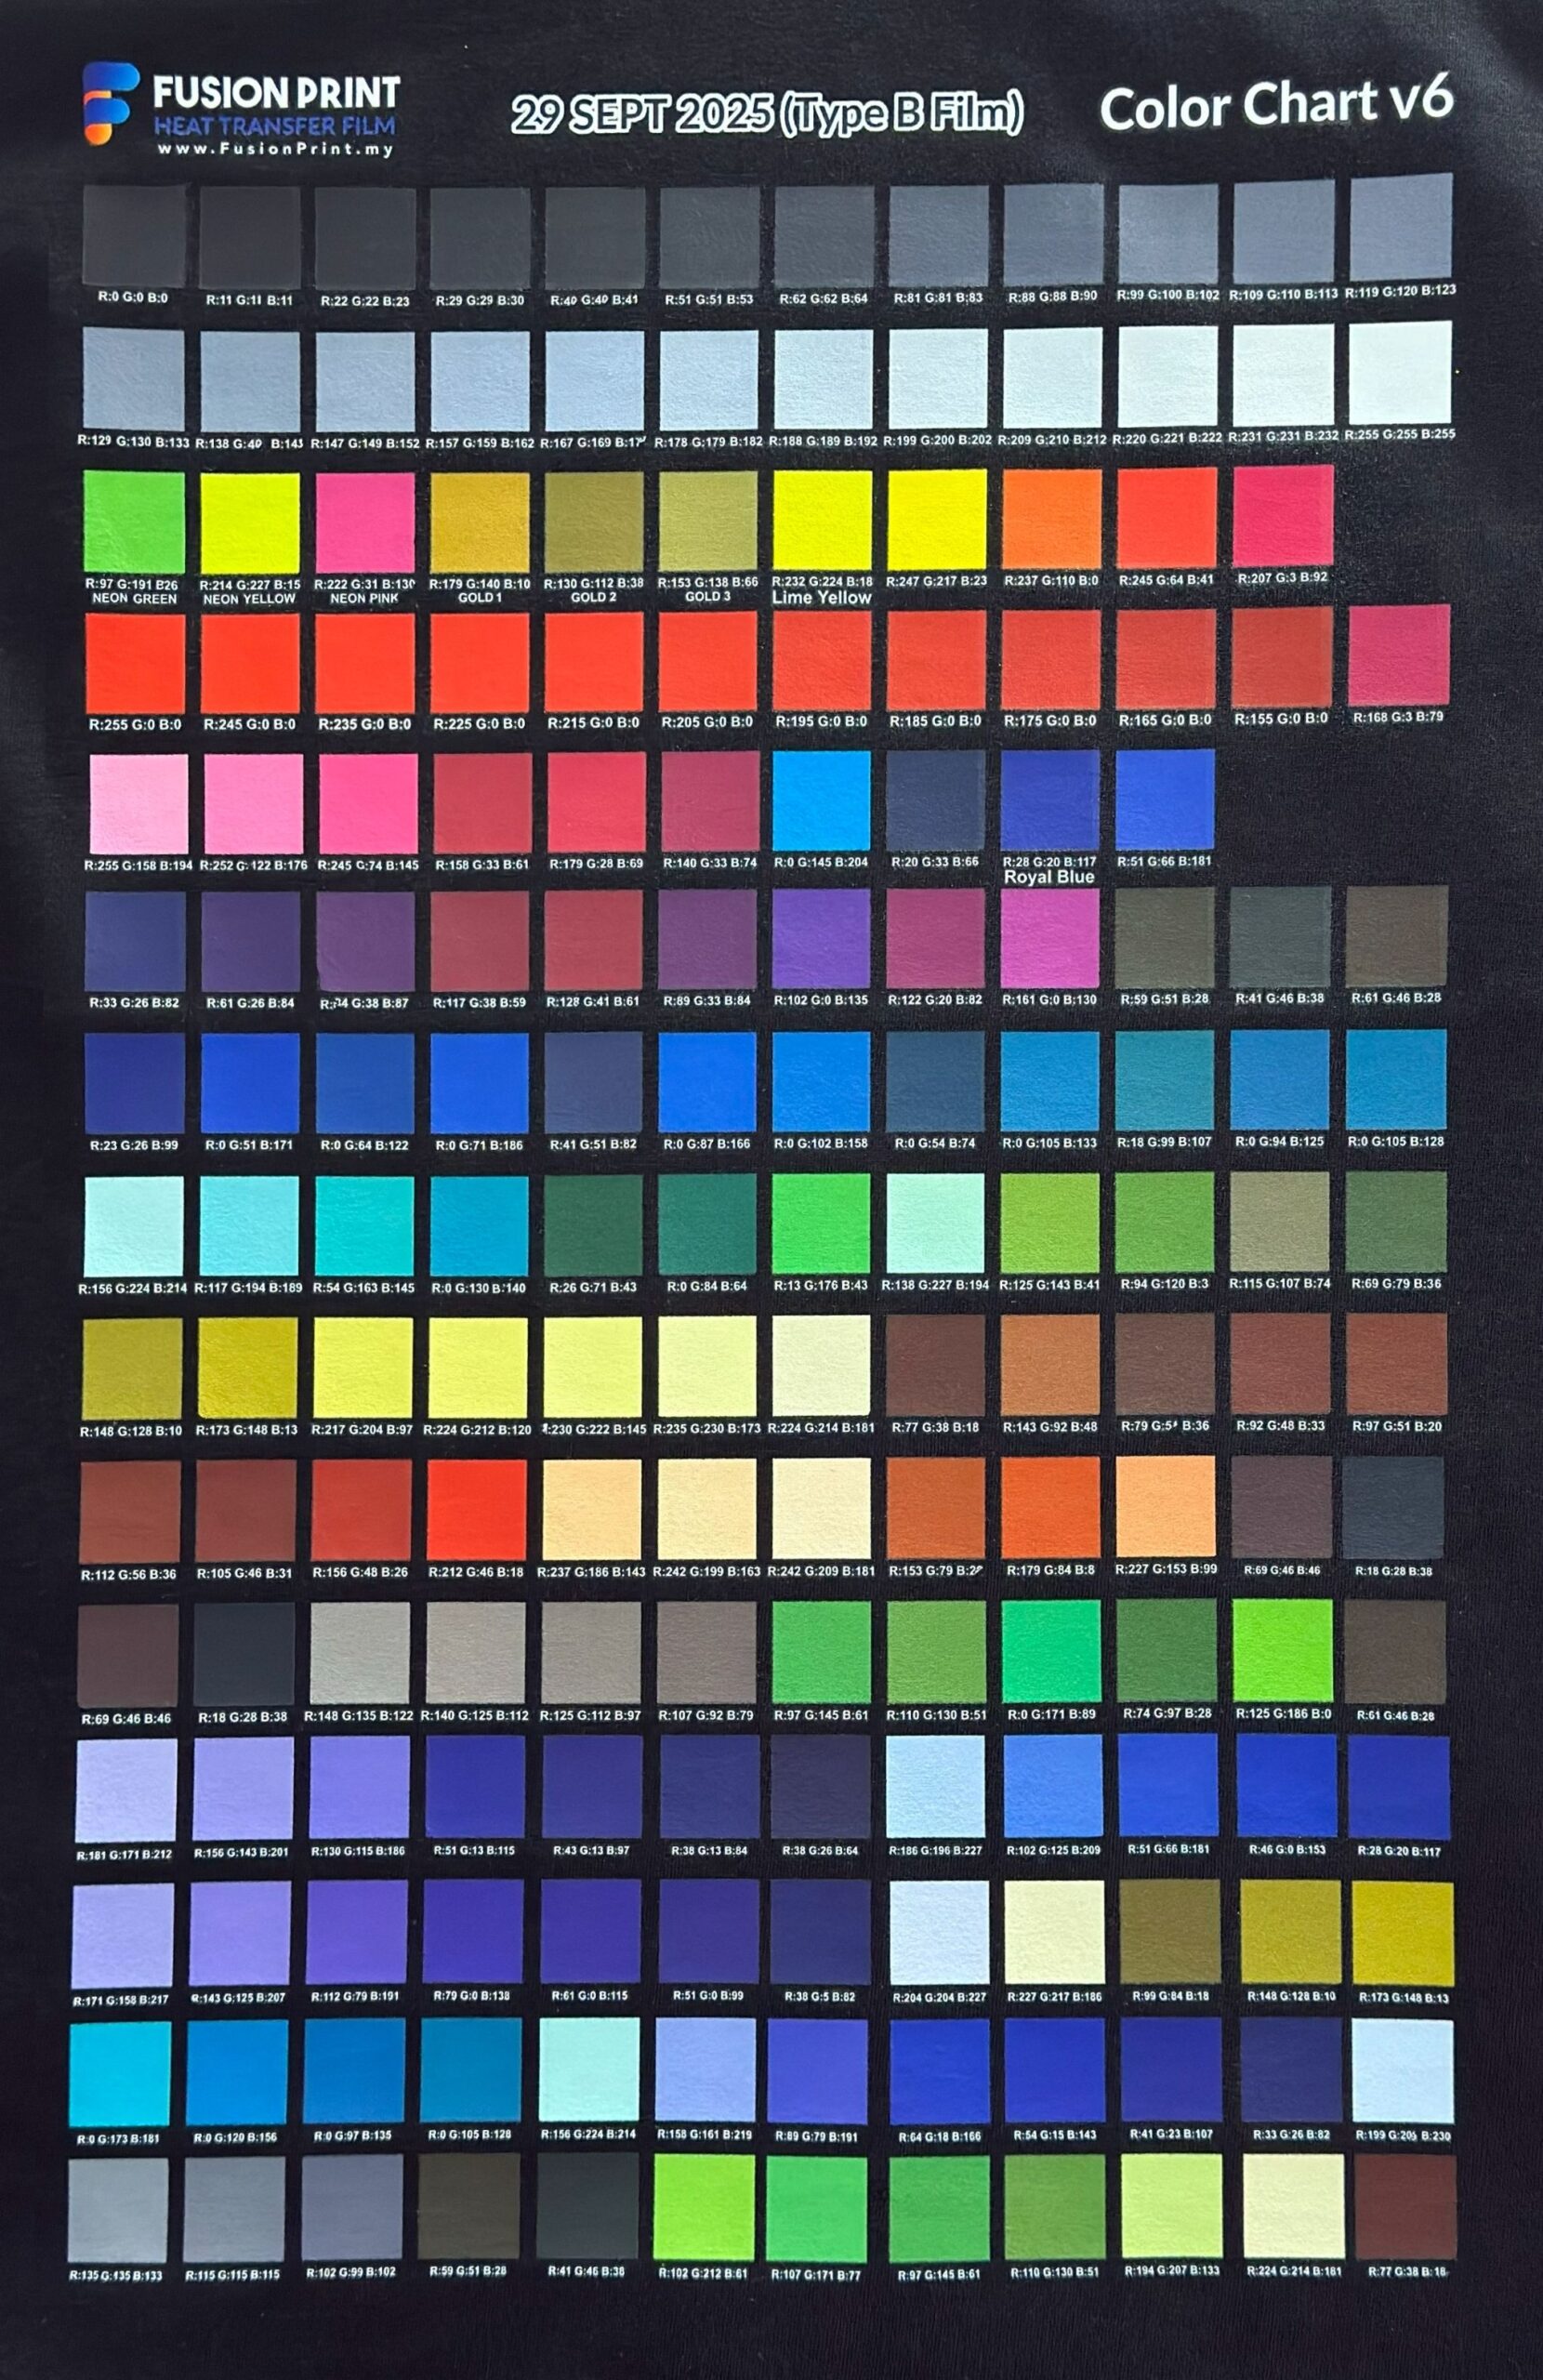
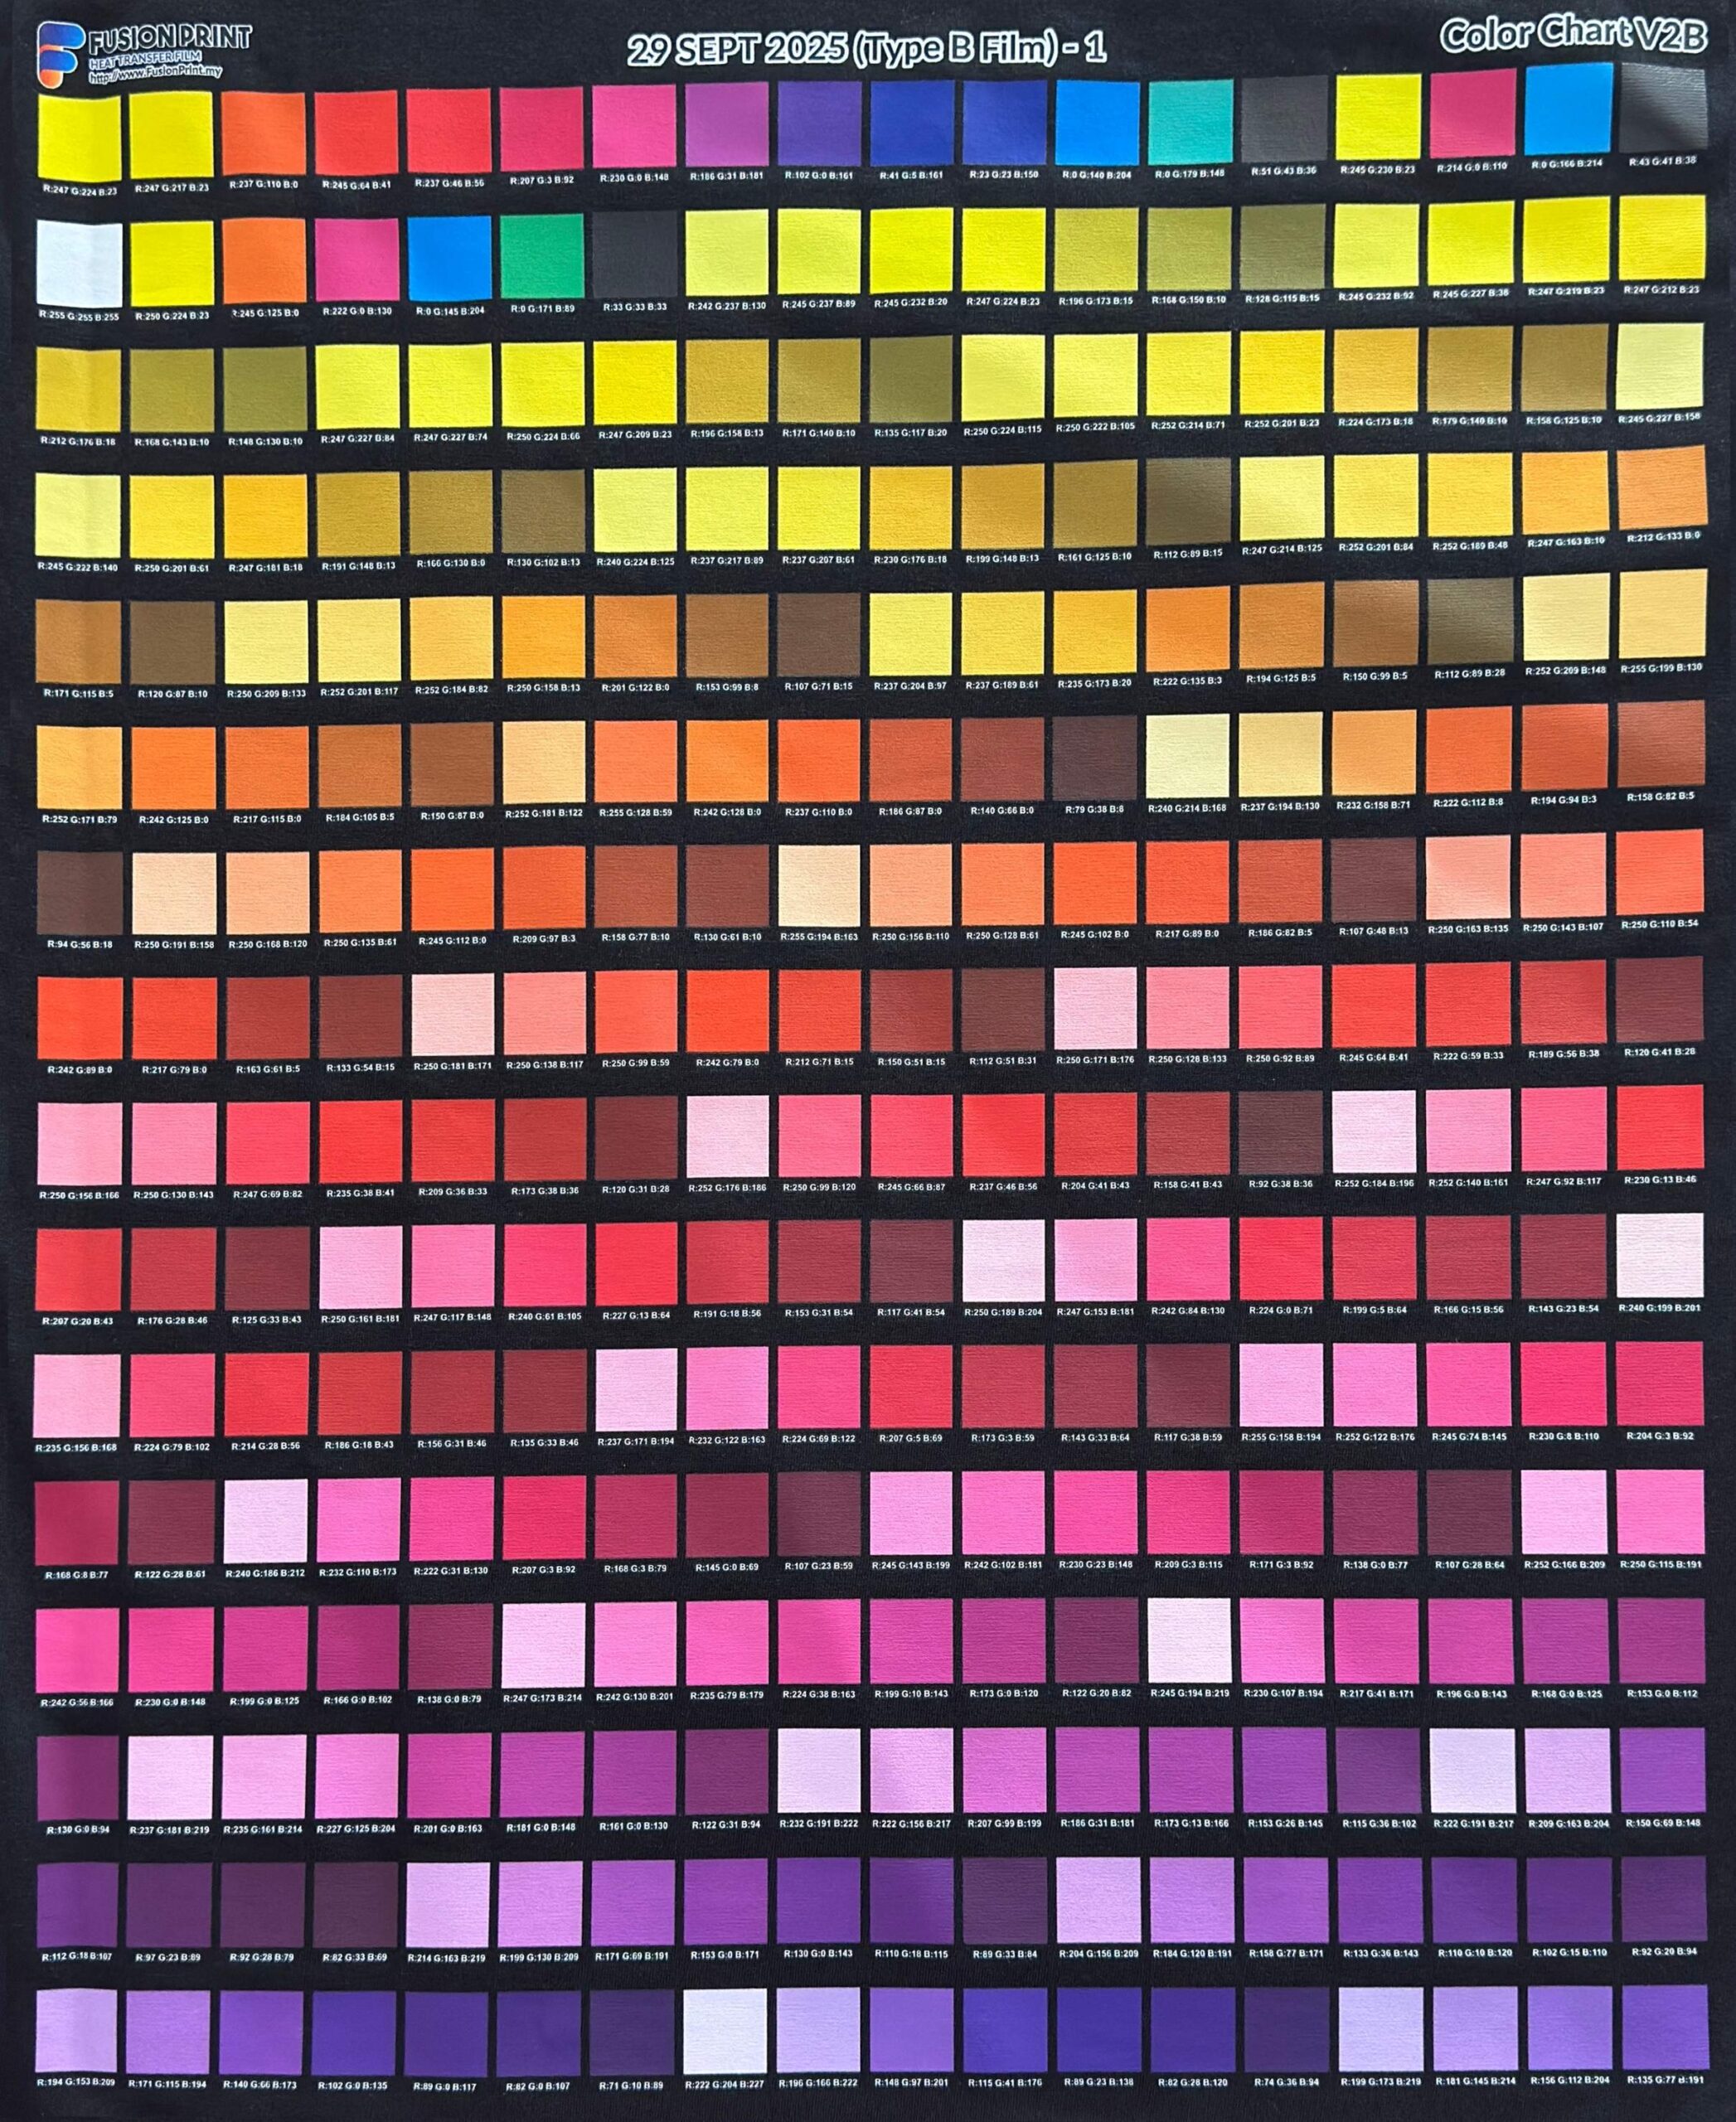
Color Chart
Enlarge image and share to download any of our Color Charts
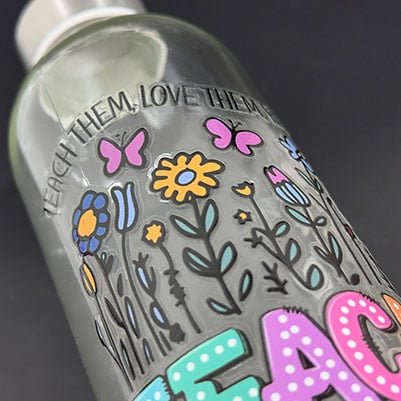
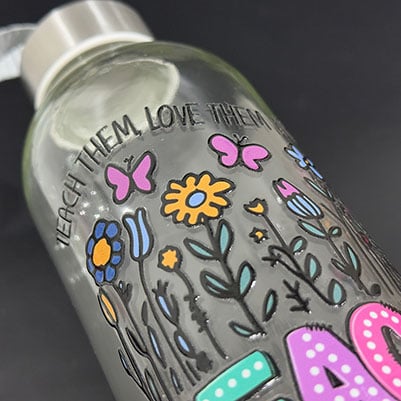
Engineered to deliver high-definition prints with exceptional color vibrancy and fade resistant, even after long exposure to sunlight and the outdoors. The laminated, heat-free transfer system enables fast, effortless application on hard surfaces including glass, metal, wood, and plastic.
Built with superior adhesion, industrial-grade durability, and a premium finish that is waterproof, scratch-resistant, and long-lasting.
UV DTF Stickers Made to Stand Out
Engineered to deliver high-definition prints with exceptional color vibrancy and fade resistant, even after long exposure to sunlight and the outdoors. The laminated, heat-free transfer system enables fast, effortless application on hard surfaces including glass, metal, wood, and plastic.
Built with superior adhesion, industrial-grade durability, and a premium finish that is waterproof, scratch-resistant, and long-lasting.
Engineered with UV-curable ink technology and precision-coated film to deliver high-definition prints with exceptional color vibrancy and fade resistant, even after long exposure to sunlight and the outdoors.
The laminated, heat-free transfer system enables fast, effortless application on hard surfaces including glass, metal, wood, and plastic. Built with superior adhesion, industrial-grade durability, and a premium finish that is waterproof, scratch-resistant, and long-lasting.
🧲 Strong Adhesion on Hard Surfaces
🔥 Heat-Free Application
⚡ Fast & Easy Transfer
Two Sided Printing
Double Sided
Double-Sided print reveals a colored back, creating a spot-color screen print effect. Best for glassware or transparent merchandises.
Single Sided
Single-Sided prints are only visible from the front, while its back area remains a dull white color. Best for solid color merchandises.
Single and Double-Sided printed designs appear similar from the front. Double-Sided printing reveals a colored mirrored design while Single-Sided displays a white colored back.
Two Sided Printing
Double Sided
Double-Sided print reveals a colored back, creating a spot-color screen print effect. Best for glassware or transparent merchandises.
Single Sided
Single-Sided prints are only visible from the front, while its back area remains a dull white color. Best for solid color merchandises.
Single and Double-Sided prints appear identical from the front, while Double-Sided printing reveals a colored back that creates a spot-color screen print effect.
Gloss Edge
Vibrant full colors. Zero borders.
No Gloss Edge: 0 mm
Benefits:
Provides a cleaner look, ideal for small surface area.
Mimics the look of direct screen printing.
Limitations:
Small designs may stick to the transfer tape.
Small details may chip off more easily.
Gloss Edge: 0.5 mm
Benefits:
Adds extra protection against chipping.
Easier to transfer small or thin designs.
Limitations:
May slightly change the design’s appearance.
Thicker gloss layer ensure artwork stays intact. However, this takes up more surface area of the merchandise.
Gloss Edge
Vibrant full colors. Zero borders.
Benefits
No Gloss Edge ~ 0 mm:
Provides a cleaner look, ideal for small surface area.
Mimics the look of direct screen printing.
Gloss Edge ~ 0.5 mm:
Adds extra protection against chipping.
Easier to transfer small or thin designs.
Limitations
No Gloss Edge ~ 0 mm:
Small designs may stick to the transfer tape.
Small details may chip off more easily.
Gloss Edge ~ 0.5 mm:
May slightly change the design’s appearance.
Thicker gloss layer ensure artwork stays intact. However, this takes up more surface area of the merchandise.
Glossy Edge
Gloss Edge - 0.5 mm
Benefits:
Adds extra protection against chipping.
Easier to transfer small or thin designs.
Limitations:
May slightly change the design’s appearance.
Thicker gloss layer takes up more space, not ideal for smaller items such as nails or pens.
No Gloss Edge - 0 mm
Benefits:
Gives a cleaner look, ideal for tight surfaces.
Mimics the look of direct screen printing.
Limitations:
Small designs may stick to the transfer tape.
Small details may chip off more easily.
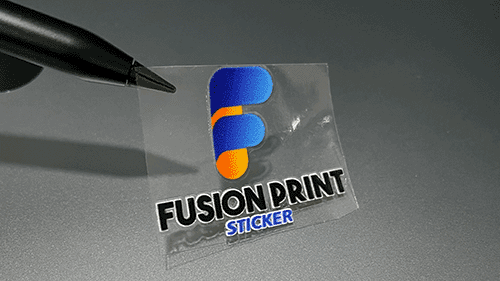
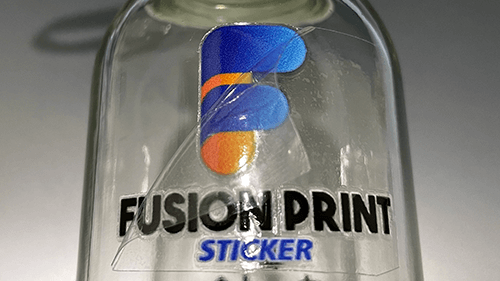
How It Works?
Step 1: Cut Out Your Sticker
Pick your favorite sticker and cut it out from the roll or sheet! ✂️
Step 2: Stick and Peel
Place the sticker on a clean, smooth surface, then press down firmly, smooth it out with a specialized squeegee or a PVC card, and finally gently peel away the transparent backing. ✨
Works best on glass, metal, and hard plastic.
Step 3: Enjoy Your New Look
Your beautiful design is now perfectly transferred and ready to show off. 🎉
Artwork Specifications
Helpful tips to ensure smooth printing for the best possible results.
Helpful tips to ensure smooth printing for the best possible results.
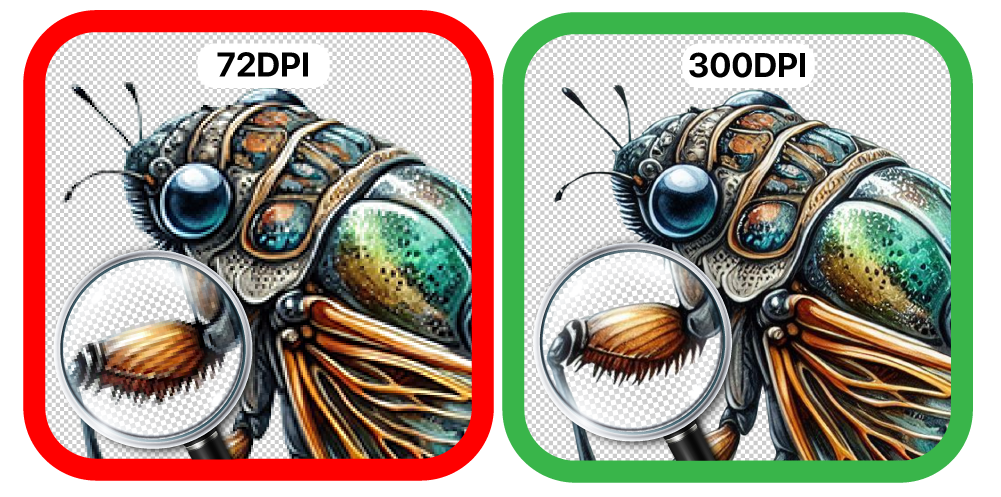
Print Perfection Through DPI
Dots Per Inch (DPI) defines your print’s detail and clarity. Higher DPI means sharper edges, smoother gradients, and vibrant, professional results. Low DPI leads to pixelation, blurred or missing lines, and dull prints.
For best results, set artwork to 300 DPI.
Print Perfection Through DPI
Dots Per Inch (DPI) defines your print’s detail and clarity. Higher DPI means sharper edges, smoother gradients, and vibrant, professional results. Low DPI leads to pixelation, blurred or missing lines, and dull prints.
For best results, set artwork to 300 DPI.
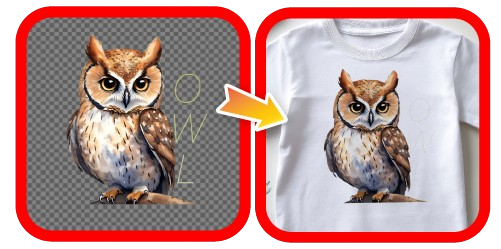
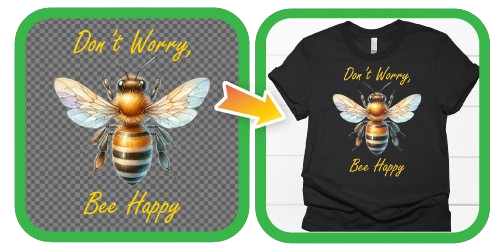
Poor Transparency
All displayed colors, including white backgrounds, will appear in the final print.
Excellent Transparency
The background is hidden in the final print. Transparency ensures precise results.
Poor Transparency
All displayed colors, including white backgrounds, will appear in the final print.
Excellent Transparency
The background is hidden in the final print. Transparency ensures precise results.
Lines or text appear too thin
Maintain a minimum stroke width of 8–10 pixels for optimal print clarity.
Use thicker or larger fonts for clearer results.
Some pixels may shrink, so keep designs bold or thick as possible to be more visible.
Lines or text appear too thin
Maintain a minimum stroke width of 8–10 pixels for optimal print clarity.
Use thicker or larger fonts for clearer results
Some pixels may shrink, so keep designs bold or thick as possible to be more visible.


